Finally, I fixed my Django REST framework static serving on a VPS deployment, this trick might work if you're using Vercel or Netify serveless platform I was getting the same issue on Vercel as well.
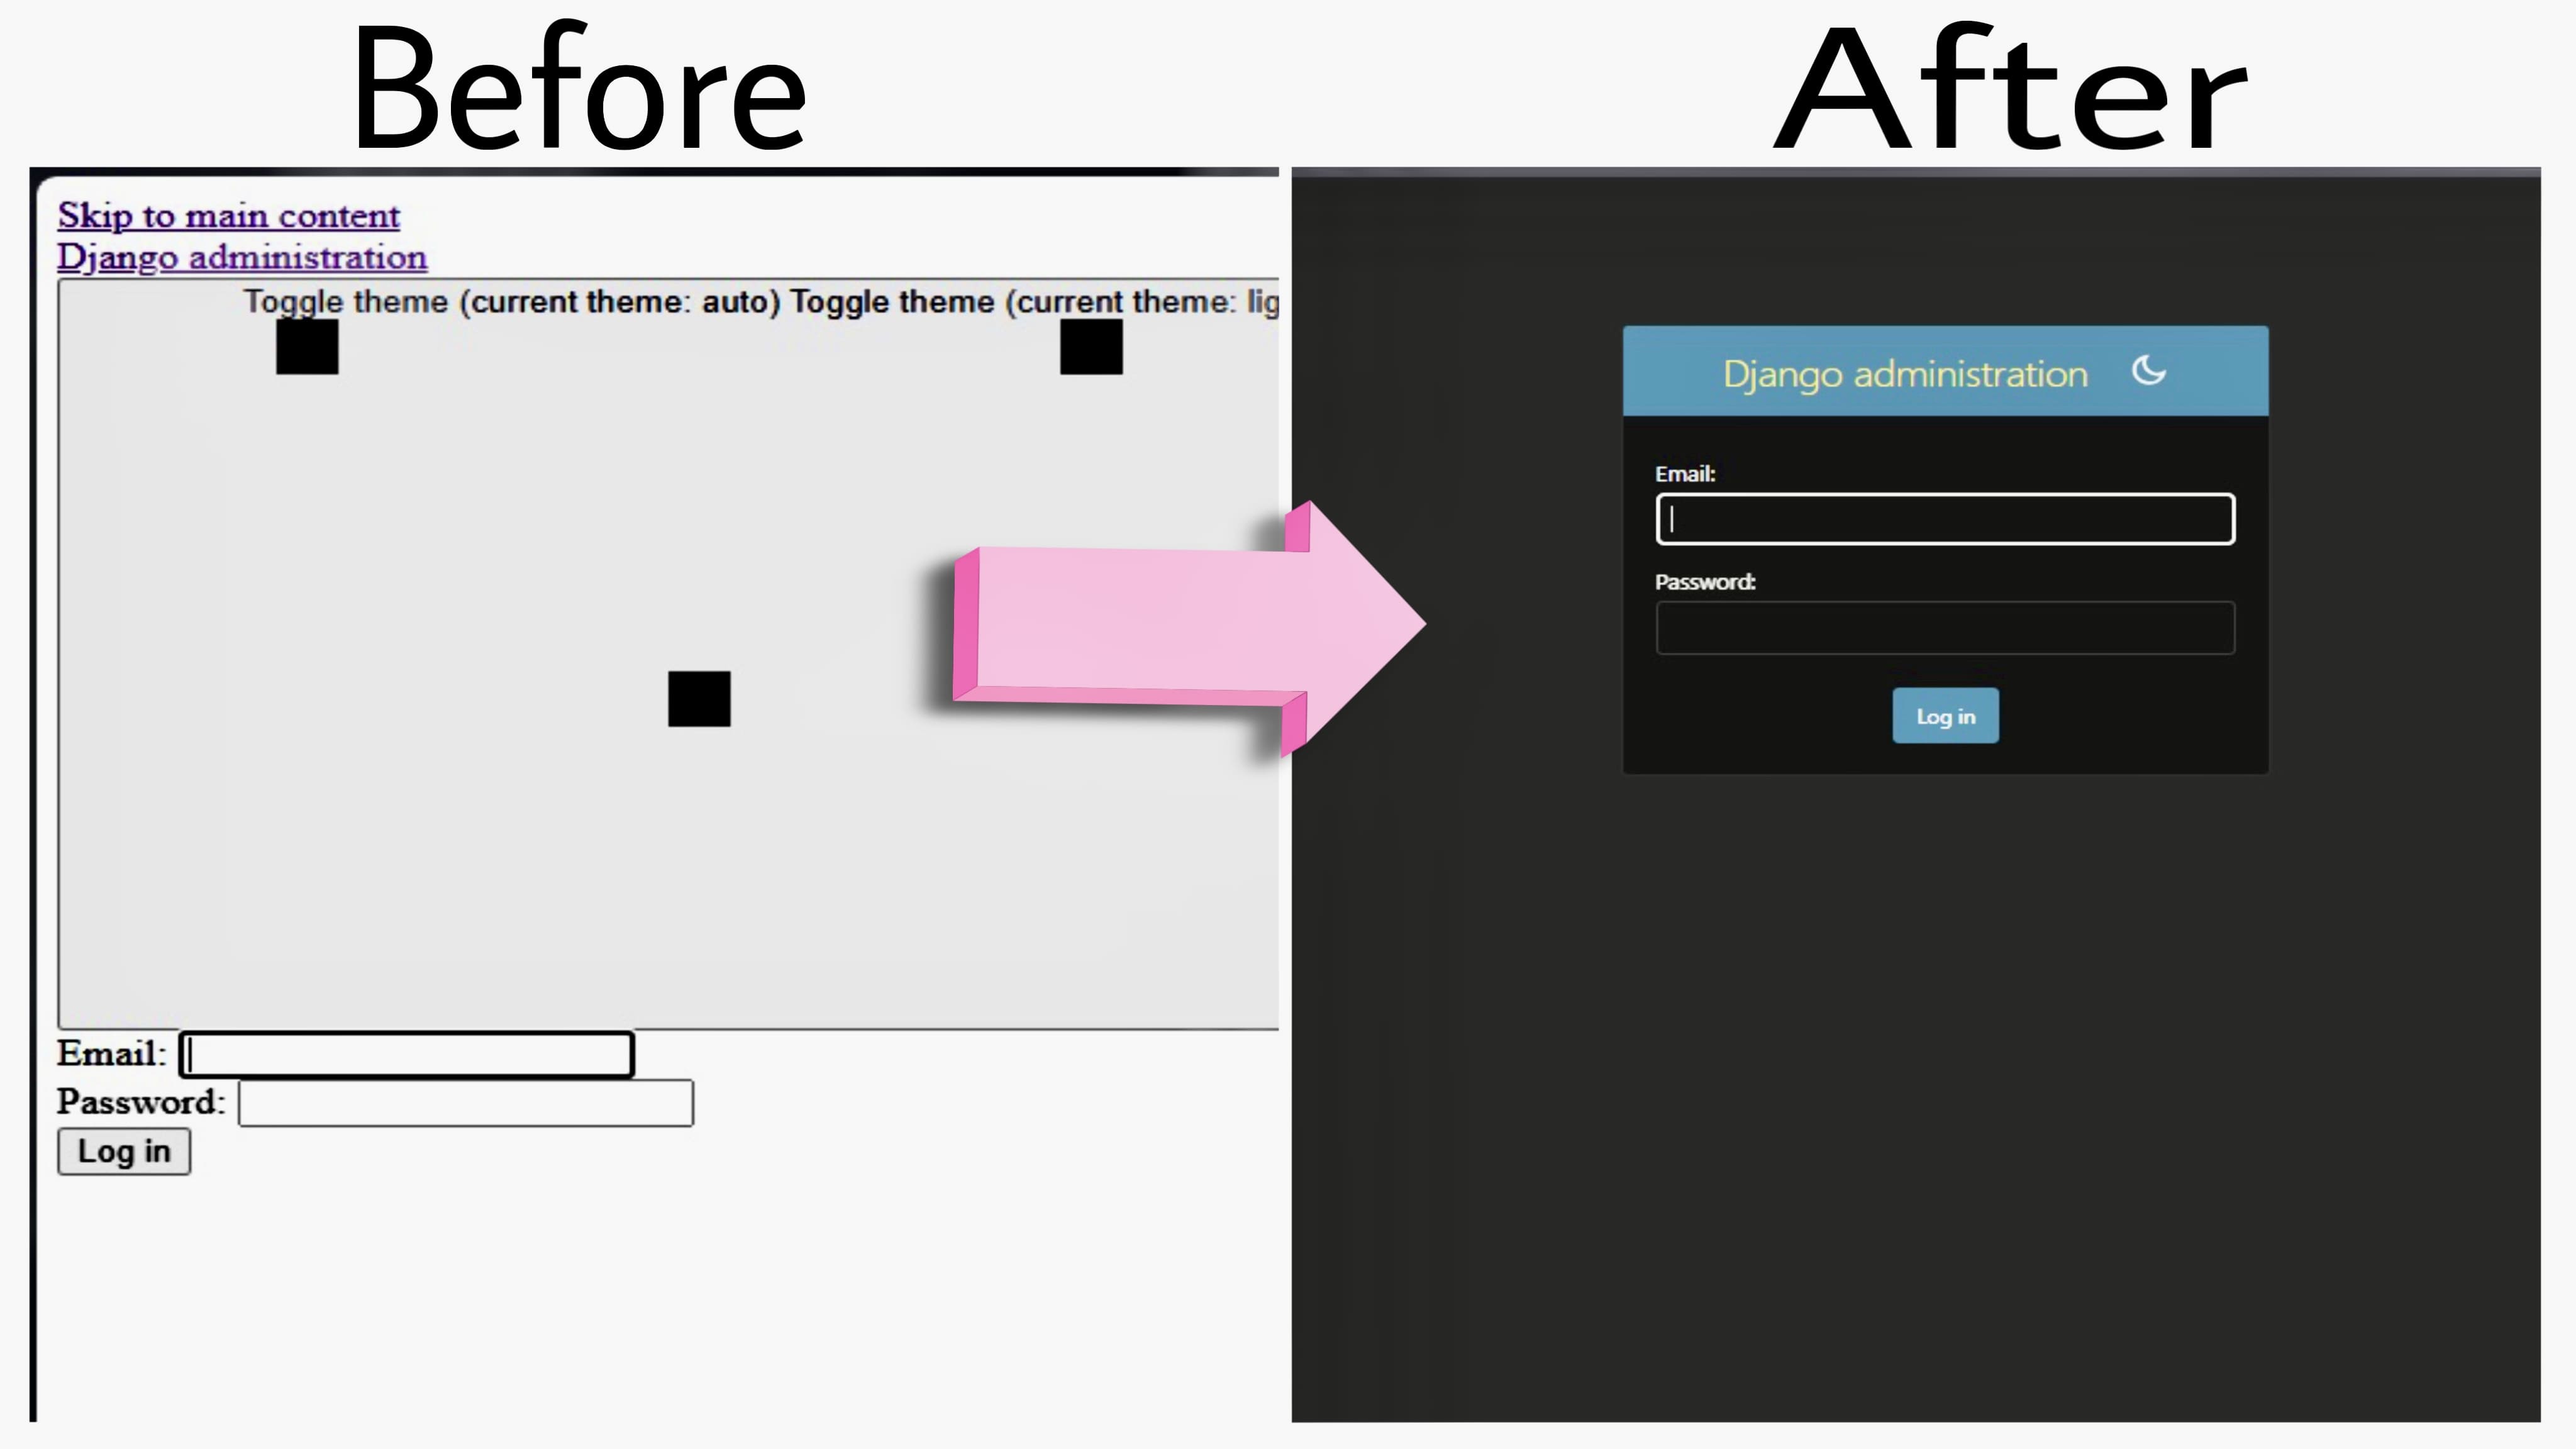
After setting up static path and media path on settings.py in my Django REST framework project, I decided to deploy it on my VPS while using Nginx and Gunicorn. After completion, I tried to access the admin panel, but my project was serving static files without styling, which you can see in the above image.
This issue occurs if your nginx can't find the static file path to serve in the deployment. In my case, I was serving from inside the project directory, such as home>vps_user_name> project_name, even after collecting the static file it didn't work.
Let me walk you through his you can fix this issue, it works for both Django and Django Rest Framework.
Django Extension Required
Before modifying the path directory and editing the virtual host file, you must have installed this package on your project. If you have not installed it in your project then run this command,
pip install django-extensionsThen add 'django_filters' to your INSTALLED_APPS.
INSTALLED_APPS = (
    ...
    'django_extensions',
    ...
)
After, installing the package, let's move on to the next steps,
2. Edit Virtual Host File
You need to change the old static and media path in the virtual host file. Log in to your VPS and run these commands,
sudo nano /etc/nginx/sites-available/your_current_virtual_host_file_nameNow, replace the old path with this new path,
location /static/  {
root /var/www/your_project_name;
}

location /media/  {
root /var/www/your_project_name;
}
Now tap CTR+X+Y then Enter to save and exit the virtual host file. To check for any syntax error run these commands,
sudo nginx -t Then restart your nginx web server while running this command
sudo service nginx restart Serving Static and Media Files from the Public Directory
You might get an error of 403, if you use the project directory to serve static and media files, just like I was using this file directory even after loading static files it didn't work.
home>vps_user_name>project_ nameInstead, now we will use the public directly, which is /var/www/,
/var/www/your_project_name Creating Static and Media Files in the Public Directory
Now let’s create the project file name inside the /var/www/, let’s access the page while using this command,
cd /var/www/Now create a directory for your Django project inside the /var/www/
sudo mkdir your_project_name Now, let’s go inside the directory, cd _your_project_name We need to create two files: one static and the other media. Let’s make it.
sudo mkdir static mediaIf you run ls, there will be two files inside the _your_project_name,
Note:- The static directory must match the directory which we have added in the virtual host file, otherwise it won’t work.Giving Permission to the VPS USER
To write on these files, we need to give permission to the VPS user because the owner is the root user, so the VPS user can’t edit the file.
First, go back while running this command,
cd ..Now you’re inside the /var/www/ and run this command,
sudo chown -R vps_user_name:group_name _your_project_name, In my case, both my username and group name are John.
Sudo chown -R john: john codewithdevMention inside the Project setting.py
Now replace your old static and media inside the project setting.py path with the new path, which I have mentioned.
# Static files (CSS, JavaScript, Images)
# https://docs.djangoproject.com/en/5.2/howto/static-files/
STATIC_URL = 'static/'
STATIC_ROOT = "/var/www/codewithdev/static/"

MEDIA_URL = '/media/'
MEDIA_ROOT = "/var/www/codewithdev/media/"
Make sure it matches your nginx virtual host file. Now that you have made changes in your project file run this command
sudo systemctl daemon-reloadthen,
sudo systemctl restart your_gunicorn_service_file_nameCollect Static Files
Now, go to your project then activate the virtual env while running this command,
source your_virtual_env_name/bin/activateIt will activate the virtual environment. Now, to run this command you must have installed the django-extension in your project, which I have shown you in the above.
python manage.py clear_pycthen
python manage.py clear_cacheNow, we need to collect the static file while running this command,
python manage.py collectstaticThis will generate a static files inside the /var/www/your_project_name. And that’s it now if you reload your browser it will serve the static and media files.
Sometimes, it doesn’t serve a static file if the debug is true, so go and edit the settings.py file and add false.